
Clear the full usable width
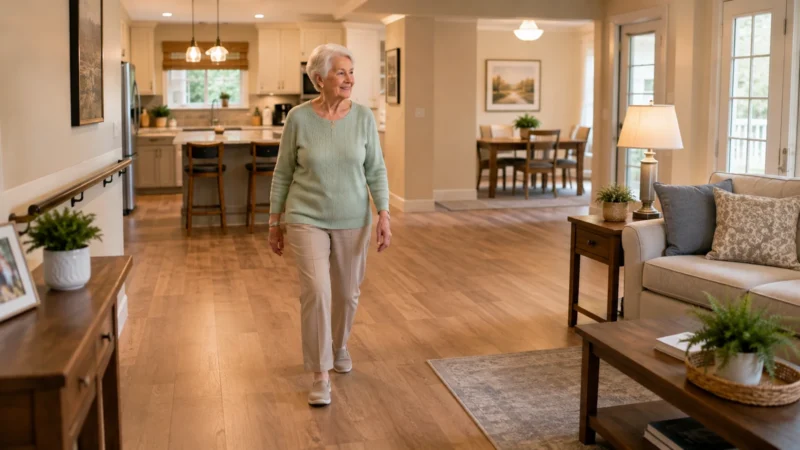
A hallway's wall-to-wall width is not the same as its usable width. Console tables, radiators, baskets, protruding shelves, door hardware, and floor vents can reduce the route.
Remove anything that requires a sideways step or forces a walker to angle around it.
Watch for door conflicts
Multiple doors opening into a hallway can create pinch points. A bedroom door, linen closet, and bathroom door may all compete for the same small area.
Consider whether doors can be rehung, changed to sliding or pocket doors, or removed where privacy and code allow.
Light the ends and intersections
A long hallway can look like a dark tunnel when only one fixture is present. Add even lighting so doorways, floor transitions, and the end of the hall are easy to distinguish.
Night lighting is particularly useful on the bedroom-to-bathroom route.
Use contrast carefully
A small amount of contrast can make doorframes, handles, and floor edges easier to find. Very busy patterns can make the floor harder to interpret.
Choose a visually calm route with obvious destinations.
ADA width as a reference
ADA accessible walking surfaces generally use a 36-inch minimum clear width, with specific limited exceptions and additional turning or passing-space rules.
That does not mean every private hallway must be 36 inches wide. It does provide a useful reference when planning a route for mobility equipment. Test the actual user and device, including turns.
Add support only where useful
A hallway handrail may help some people, but it also projects into the path. If installed, it should be continuous where practical, graspable, securely attached, and positioned so it does not create a new obstruction.
For specific balance or mobility needs, professional assessment can help determine whether a rail adds value.
Quick Reference
| Hallway issue | Check | Improvement |
|---|---|---|
| Furniture projects into path | Usable clear width | Remove/reposition |
| Door swings collide | Open all nearby doors | Rehang or redesign where suitable |
| Dark ends | Visibility at night | Add even/path lighting |
| Floor changes | Lip, loose edge, glare | Repair or simplify transition |
| Tight turn | Actual device movement | Clear adjacent furniture or modify doorway |
Keep the edges of the hallway useful
A hallway often becomes narrow because of furniture, baskets, shoes, decorative tables, or wall-mounted items that project into the path. The center may look clear while the usable width is reduced.
Remove or relocate objects that do not need to live in the hallway. If storage is necessary, use shallow options that do not create sharp corners at hip or shoulder height.
Check what happens when doors are open
Bedroom, bathroom, closet, and laundry doors can swing into a hallway and temporarily block the route. Two nearby doors may also conflict with each other.
Open every door at the same time and walk the route. If the conflict is frequent, consider whether changing a door swing or hardware would help.
Light the intersections and ends
The end of a long hallway can look dark even when a ceiling fixture is present. Intersections and doorways can also create strong shadows.
Use even light along the route and make switches easy to reach from both ends when practical. A night-light can help if the hallway is part of the bedroom-to-bathroom route.
Add support only where it matches the movement
A wall rail can help in a long corridor for some people, but it also reduces usable width and needs secure structural attachment.
If support is needed, decide which section of the route benefits from it and make sure the grip remains clear of door trim, switches, or other obstructions.
Choose the change that improves a real route
You do not need to redesign the entire home because one path has become awkward. Start with the route that affects your day most often. Remove movable obstacles, improve lighting, change storage, or adjust furniture before assuming construction is necessary.
If a larger change is needed, define what should be easier after the project. That makes it easier to compare a ramp, lift, doorway change, first-floor arrangement, or another option based on the way you actually use the home.
Test the route during a normal day
A route can pass a daytime walkthrough and still feel different when the house is busy. Doors are open, laundry is waiting, packages arrive, pets move through the room, and lighting changes after sunset. Use the route under the conditions that normally make it busiest.
Notice where you hesitate, back up, turn sideways, or reach for furniture. Those moments give you more useful information than a measurement alone and help you choose a change that fits real life.
Keep the solution simple enough to maintain
Any ramp, lift, rail, door change, or rearranged space will need cleaning, inspection, adjustment, or repair. Ask who will maintain the change and how you will know when something needs attention. A complicated solution can become a new burden if nobody understands it.
When two options solve the same problem, consider the one that still works during a power outage, busy week, or temporary change in routine. Simplicity can be an important part of independence.
Use qualified help for structural changes
Door widening, ramps, stair work, rail installation, wall changes, and electrical modifications can affect structure, weather protection, building requirements, and other systems in the home. A good idea still needs to be installed correctly.
Describe the exact route problem to the professional and ask how the proposed work changes the approach, landing, door operation, drainage, lighting, and surrounding space. This keeps the project focused on daily use rather than only on the product being installed.
Review the result after you have lived with it
Use the changed route for several days before deciding the work is finished. A moved table, different door swing, new ramp, or added rail can solve one problem while changing how another person moves through the same space. Check the route in both directions and at different times of day.
If the original difficulty remains, write down the exact moment that still feels awkward. That information is far more useful for the next adjustment than simply deciding that the first change did not work.
Sources
Frequently Asked Questions
How wide should a hallway be for a wheelchair?
ADA uses 36 inches as a common minimum accessible-route reference, but private-home needs depend on the actual chair and turns.
Should hallways have handrails?
They can help some users, but they also reduce clear width. Use them only when they solve a real support need.
Are runners safe in hallways?
Loose runners can slide or curl. A continuous secure floor surface is generally easier to navigate.
What lighting works best?
Even general lighting plus low-level nighttime illumination on frequently used routes.
What if the hall itself cannot be widened?
Improve doorway approaches, remove projections, simplify turns, and consider whether a different route or room assignment can avoid the bottleneck.
Keep this visual on Pinterest
Save the infographic so you can return to the checklist or comparison when you need it.
 Save on Pinterest